


Page
Making Chandelier lamp symbol in AutoCAD
Completion requirements
Below is a complete, step-by-step, highly detailed guide for Topic 3: How to Draw a Chandelier Lamp Symbol Using AutoCAD, including one reference to AutoCAD as required.
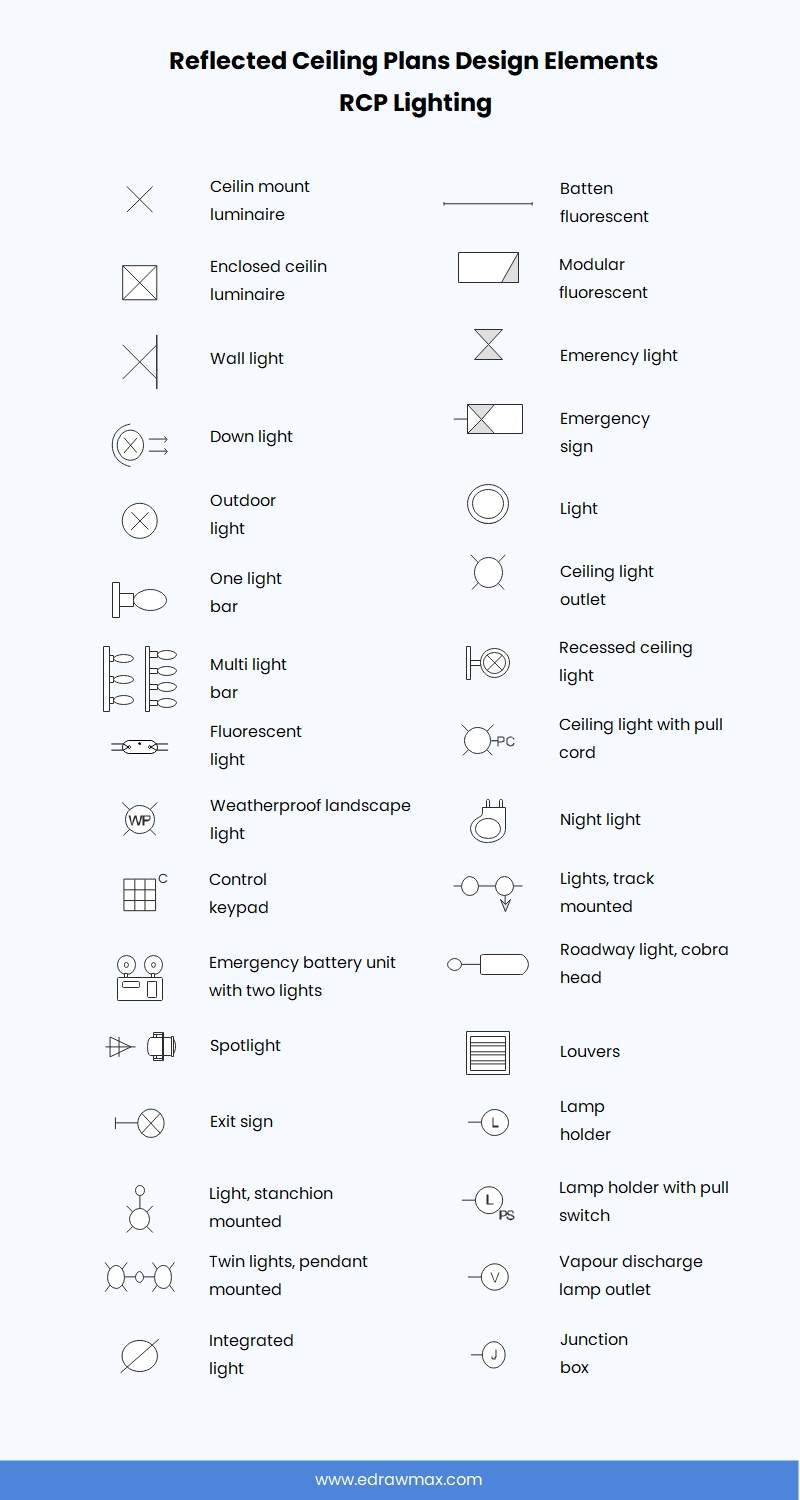
I have also included an image group to visually support students on what chandelier symbols look like in drafting standards.

7
Lighting symbols in architectural and electrical drawings must follow drafting conventions. A chandelier symbol usually appears as a multi-arm circular symbol, representing a decorative ceiling-mounted light fixture.
This guide walks learners through drawing the symbol manually using AutoCAD, ensuring they understand geometry construction, layer standards, annotation, and block creation.
1. Before You Start: Setting Up
1.1 Create Proper Layers
Create a new layer for lighting symbols:
-
Type LAYER → ENTER
-
Click New Layer
-
Set:
-
Name:
EL_LIGHTING_SYMBOL -
Color: Yellow (or per institution standard)
-
Lineweight: 0.20 mm
-
-
Click Set Current
This ensures your chandelier symbol follows professional drafting standards.
2. Chandelier Symbol Geometry Breakdown
A chandelier symbol typically contains:
-
A main circle representing the fixture body
-
Radial arms (3–6 arms depending on design)
-
A center point indicating installation point
-
Optional: small circles representing bulbs
We will draw a 6-arm chandelier with bulb tips.
3. Step-by-Step Drawing Guide
STEP 1: Draw the Main Body Circle
-
Type CIRCLE → ENTER
-
Specify center point:
-
Click any point OR type coordinates (e.g.,
0,0)
-
-
Specify radius:
-
Type
150(or 100–200 mm depending on symbol size)
-
This forms the central body of the chandelier.
STEP 2: Draw the Center Mark
-
Type POINT → ENTER
-
Snap to the exact center of the circle
-
If the point is too small:
-
Type DDPTYPE
-
Choose Cross/X symbol
-
Set size to 5 or 10
-
This marks the installation point on the ceiling.
STEP 3: Draw the First Arm
-
Type LINE → ENTER
-
Snap to the center
-
Drag horizontally to the right
-
Type length:
-
250→ ENTER
-
This becomes the first chandelier arm.
STEP 4: Create 5 More Arms (Using Polar Array)
-
Select the arm line
-
Type ARRAYPOLAR → ENTER
-
Select center of the main body circle
-
Set:
-
Number of items: 6
-
Angle to fill: 360
-
-
Click OK
You now have 6 evenly spaced arms.
STEP 5: Draw Lamp Bulb Circles at Arm Tips
-
Type CIRCLE → ENTER
-
Snap to endpoint of one arm
-
Radius:
30(or appropriate size)
Then:
-
Select bulb circle
-
Type ARRAYPOLAR again
-
Use same center
-
Number of items: 6
Now each arm has a bulb indicator.
STEP 6: Add Decorative Ring (Optional)
To enhance the symbol:
-
Type OFFSET → ENTER
-
Select main body circle
-
Offset distance:
-
20mm outward
-
-
Creates concentric ring → a more decorative chandelier look
STEP 7: Add Symbol Annotation (Optional)
-
Type TEXT or MTEXT
-
Place the text below the symbol
-
Enter label:
-
CH(standard abbreviation for chandelier) -
or full:
Chandelier Light
-
Use height: 150–200 mm depending on drawing scale.
STEP 8: Convert to Block for Reuse
-
Type BLOCK → ENTER
-
Block Name:
-
EL_CHANDELIER_6ARM
-
-
Select base point:
-
Center of the symbol
-
-
Select objects:
-
The entire chandelier symbol
-
-
Choose: Convert to Block
Click OK.
Your chandelier symbol is now reusable.
4. Recommended Variants Students Can Produce
You may include these versions for extended practice:
Variant A: 3-arm chandelier
-
Use polar array with 3 items
-
Smaller radius arms
Variant B: 8-arm chandelier
-
Use polar array with 8 items
Variant C: Modern chandelier
-
Replace bulbs with rectangles
-
Add dual offset rings
Variant D: Simple symbol
-
Only a circle + cross + two small arcs (fast drafting version)
5. Common Mistakes to Avoid
| Mistake | Why It’s Wrong | Fix |
|---|---|---|
| Arms not equally spaced | Causes inaccurate symbol | Use ARRAYPOLAR |
| No base point assigned | Block inserts incorrectly | Always pick center as base |
| Using random layer | Messes up electrical plan | Always use lighting layer |
| Bulb circles not aligned | Inaccurate look | Snap endpoints or use array |
6. Final Output (What Students Should Produce)
A clean chandelier symbol containing:
-
Central circle
-
6 evenly spaced arms
-
6 bulb circles
-
Optional decorative ring
-
Annotation “CH”
-
Saved as block:
EL_CHANDELIER_6ARM
Last modified: Wednesday, 26 November 2025, 4:47 PM